The photography editing workflow is similar to night photography and photography in general: We try to copy others and we try to get the same photograph results in terms of composition, colors and editing.
With the experience we gain throughout the journey, things must change in a way to meet our taste and personality, and that’s why after 10 years of experience, I can’t argue about what’s the right white balance for any photo taken by anyone… It is a matter of taste and personality.
Our editing workflow is directly related to our style of shooting and even camera capability and our raw files latitude (how much data you can extract from shadows or even how much data can be restored from highlighted areas in the same photograph).
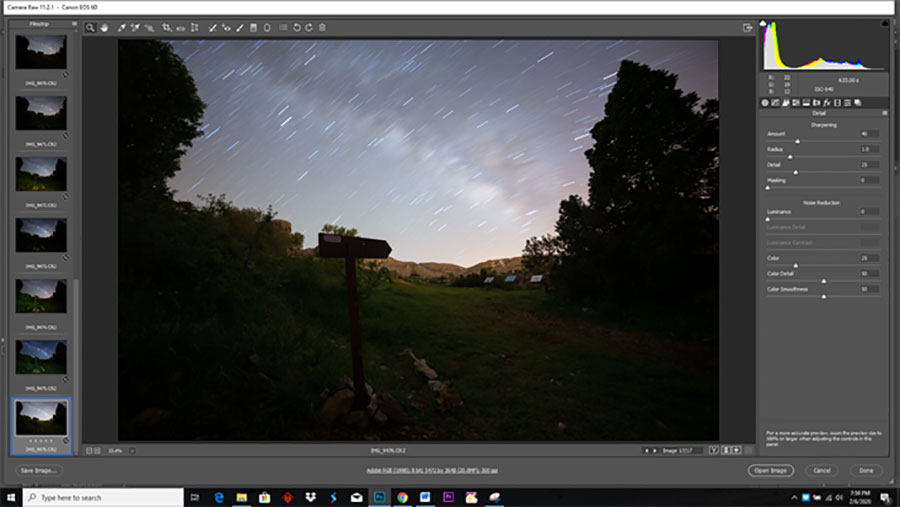
Long exposure (633seconds) for the foreground at low ISO 640
When you know your camera ISO performance and its extreme limit, you cannot go beyond those limits thinking that during post processing you will fix that huge amount of noise without sacrificing quality. We as, night shooters learned, it is better for us to save time and to maintain sharpness in our files, we better turn off camera high ISO noise reduction and the long exposure noise reduction features, which is in most cases true but in some it is not. Those features can reduce sharpness in the whole photo and damage the stars in it. In some cases, I learned that the long exposure noise reduction is a must, especially for my foreground when my sky is not starry.
When doing long exposure shots, above the 30 seconds, we are exposing our sensor to heat and it will start generating a different kind of noise which comes from the sensor heat.
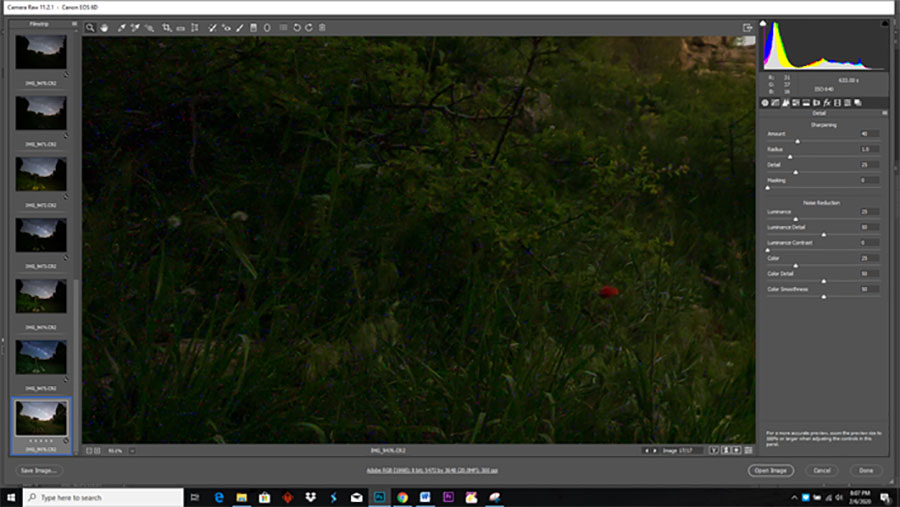
Same image zoomed at 93% on shadows with noise reduction at 25%
These noises are colored red blue and even green, each time I couldn’t deal with them in post processing… It’s very hard to get rid of them, but when using the built in feature (long exposure noise reduction) I find myself in a better situation to edit my photographs.
The noise I am referring to, is generated from the sensor heating.
It is very hard to deal with it.
With the experience I’ve gained in the field, I learned that such noises are beatable when the long exposure noise reduction in-camera feature is on.
With those examples, I just want to highlight the importance of the expertise in photography and how the knowledge related to the camera as a device and its features will save time and editing disaster in some cases.
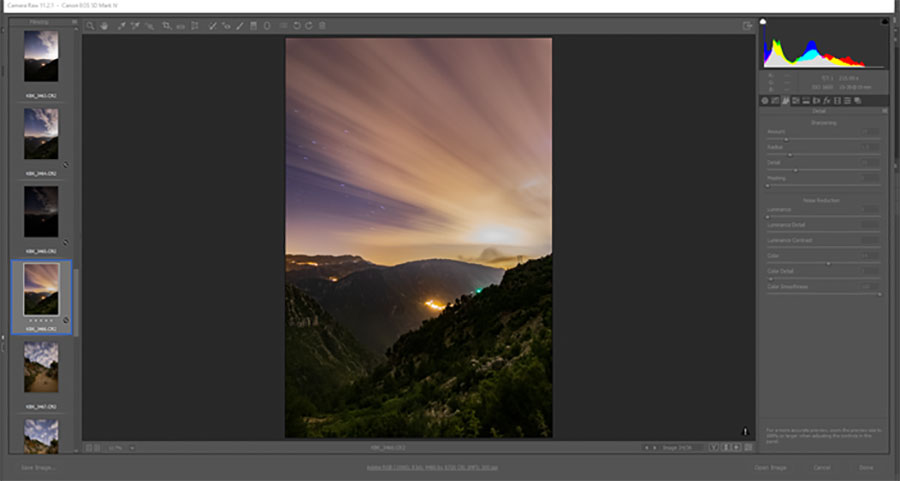
Long exposure (215seconds) at iso 1600 no noise reduction foreground is free from heated pixels.
Let’s not forget about the white balance, its importance, and its role in showing additional noise.
I’m a photographer who uses shooting techniques to save some editing time at home, I shoot in raw but I pick my right white balance in-camera, I do multiple exposures and then blend them if my foreground is too dark and I want to show some details in it, or maybe I do some light painting for the same purpose.
Sometimes, I shoot my foreground right after blue hour to get a clean and sharp or maybe a lovely contrast, then I wait for the night sky.
All these shooting techniques can save time at home, knowing that I enjoy editing my files at home to enhance my photos, adding contrast to some part of my photographs.
I don’t do a global editing, instead only a partial editing to any photograph.
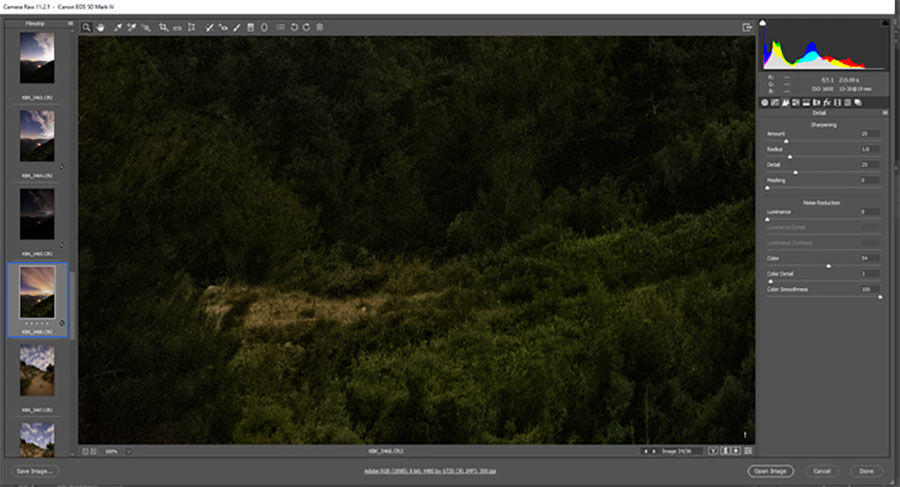
Same foreground zoomed at 100%, you can notice how clean from heated pixels thanks to the long exposure noise reduction in camera.
I even correct my photo colors partially, with many source of light at night (street lights, light pollution, moon light, cloud light reflections…)
You can’t have the same color temperature in the whole photograph, so sometimes, I use the white balance bracketing method in-camera to correct that or I do it using Photoshop to correct light in some areas.
As you can see my workflow doesn’t start at home on my files, it begins with the shooting process on the field.
What I do at home is adding some sharpness or maybe some contrast, sometimes using some dodge and burn tool; increasing shadows, decreasing highlights, adding some noise reductions, and that’s it!
before
after
Photography
LATEST BLOG POSTS
Read about the latest projects, news, stories, and some tips on the blog.
January 26, 2023 Tips Shooting the same composition, in the same location, repeatedly. Shooting the same location or even nearly the same composition, many